
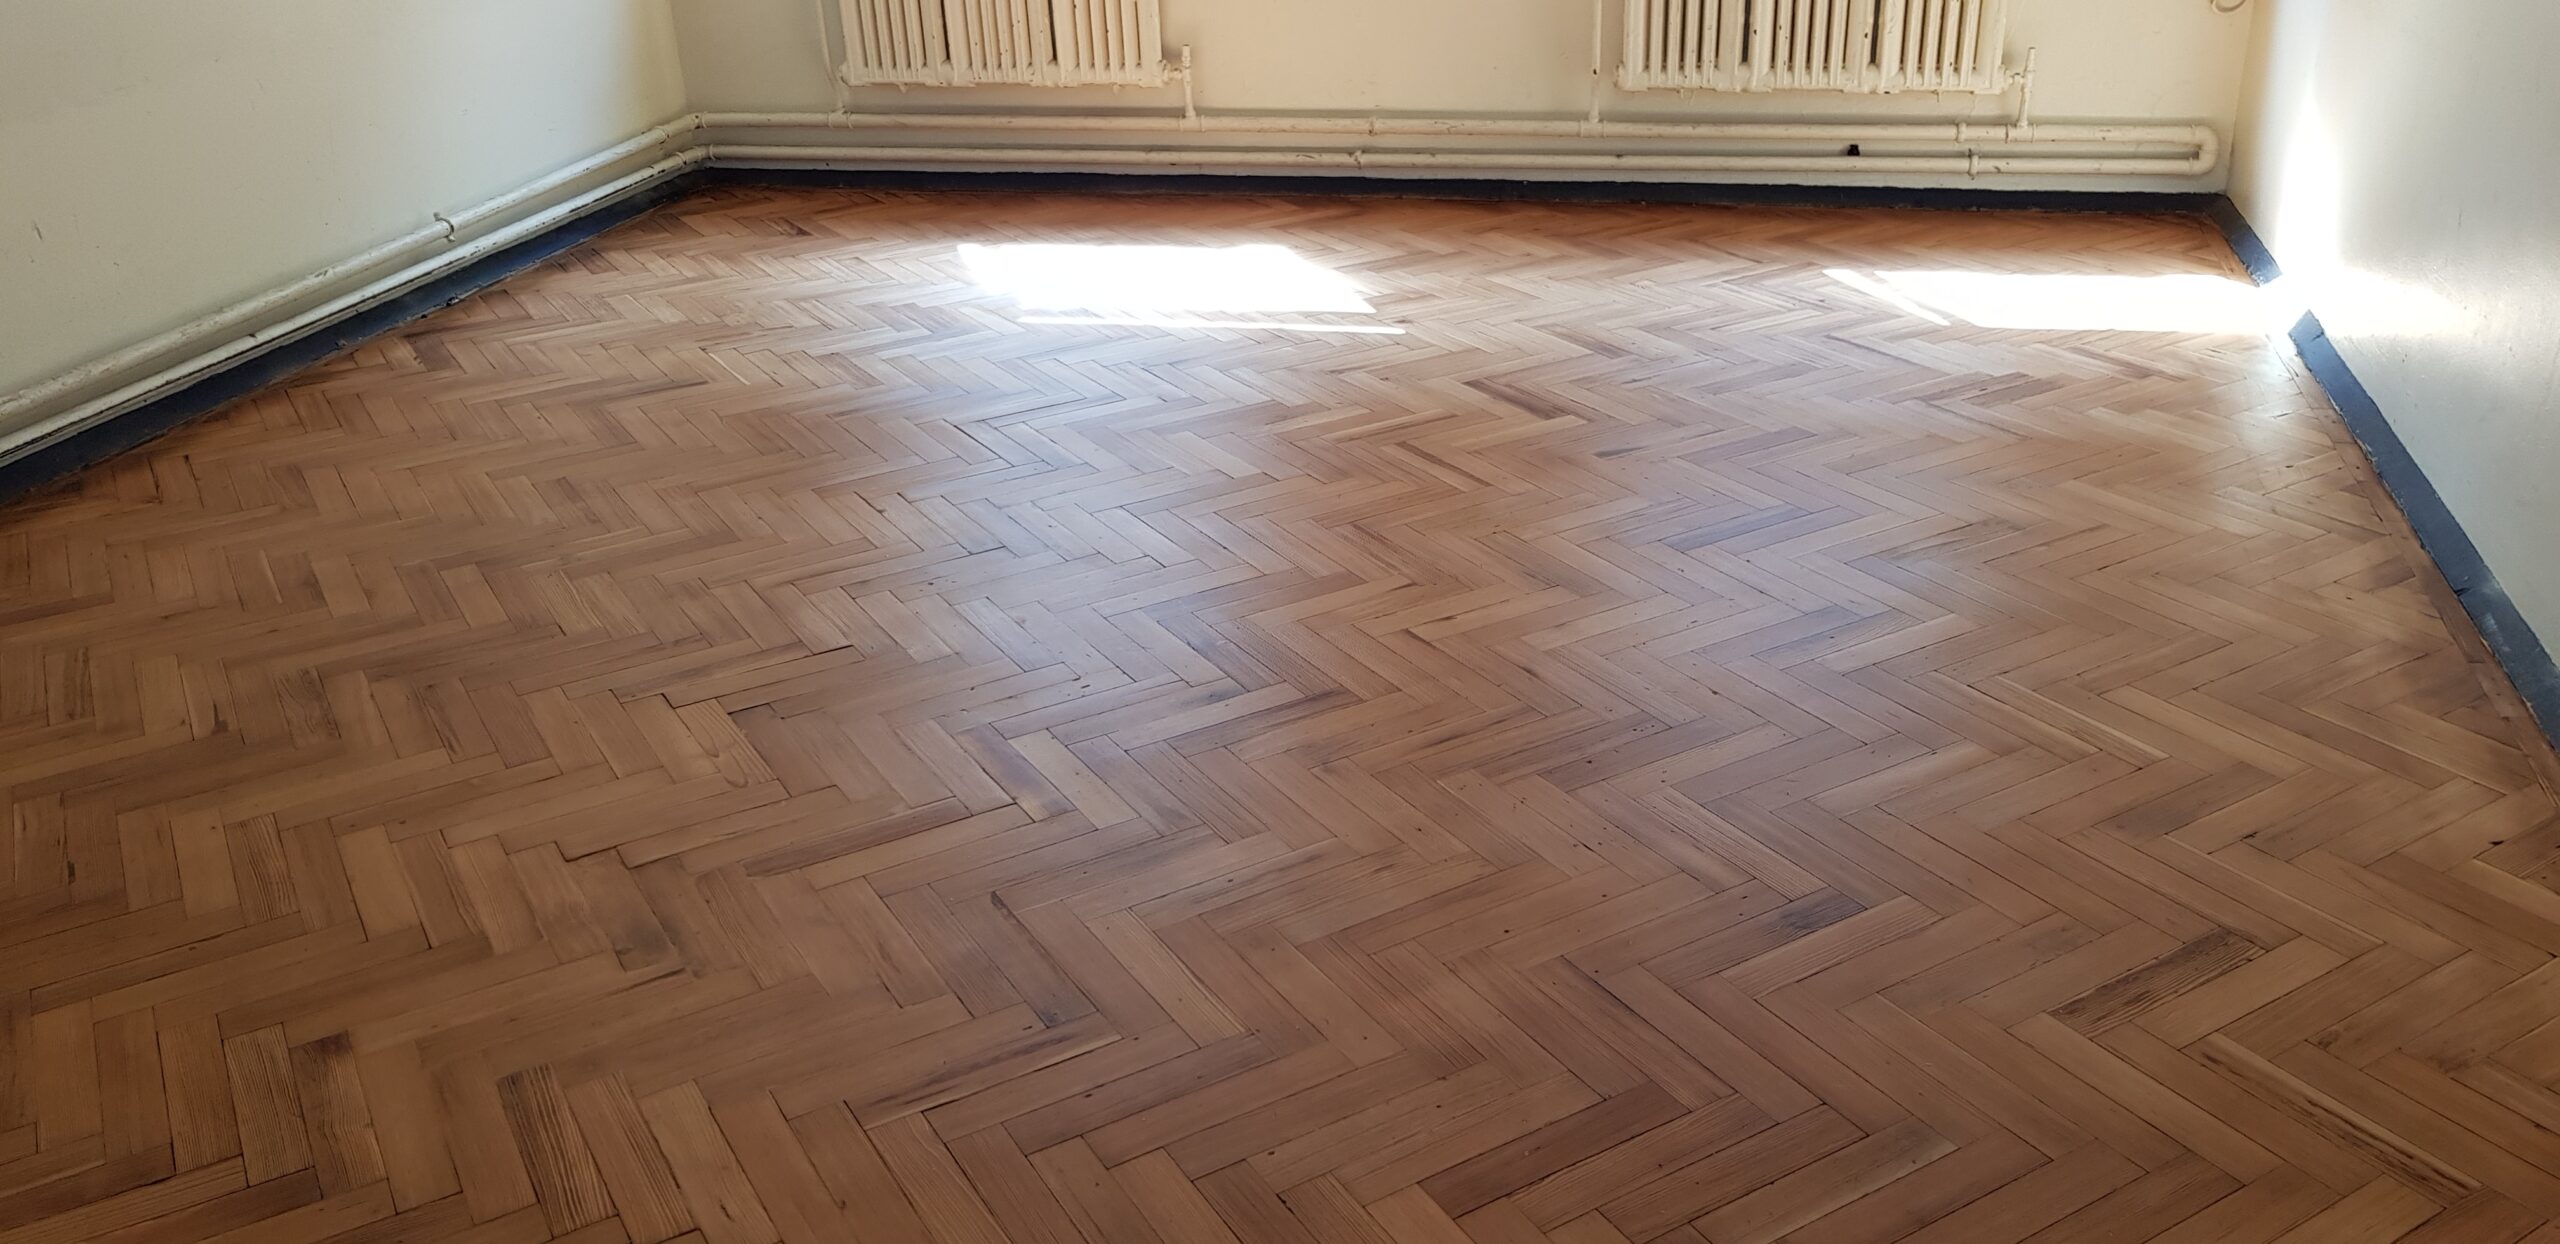
How To Restore Parquet Flooring?

Barford’s had an enquiry regarding carrying out the restoration to original parquet classroom floors throughout a Southend Boys School. It’s a really cost-effective and ecologically sound way to restore rather than replace – and it looks great!!
Arrange a meeting with the property manager to survey the pitch pine parquet before any works were carried out, and then a full written quote could be offered. They surveyed each specified classroom to identify problem areas. Each room had a lot of foot traffic, with 30 sets of shoes shuffling in and out every hour, as well as chairs being dragged across the surface and damaging the wood. In some areas, the floors have chipped, gouged, badly worn and damaged many parquet blocks, exposing rough edges and in some cases, sharp splinters.
 As you can see in the image below, some edges are rather sharp and pronounced, leaving an uneven surface for desks and chairs to stand upon. The old varnish has worn away, offering no protection to the pitch pine parquet. As well as this, if you look closely you can see a lot of scuff marks and indentations on chair and table legs. These require rubber cappings properly fitted, to protect the floor from excessive wear. After carrying out an assessment, Mark from Barford’s confirmed that the parquet restoration was within our remit and reached an agreeable schedule to carry out the work. Full site-specific RAMS and insurance details were then issued to ensure the works are health & safety compliant.
damaged parquet flooring
parquet flooring

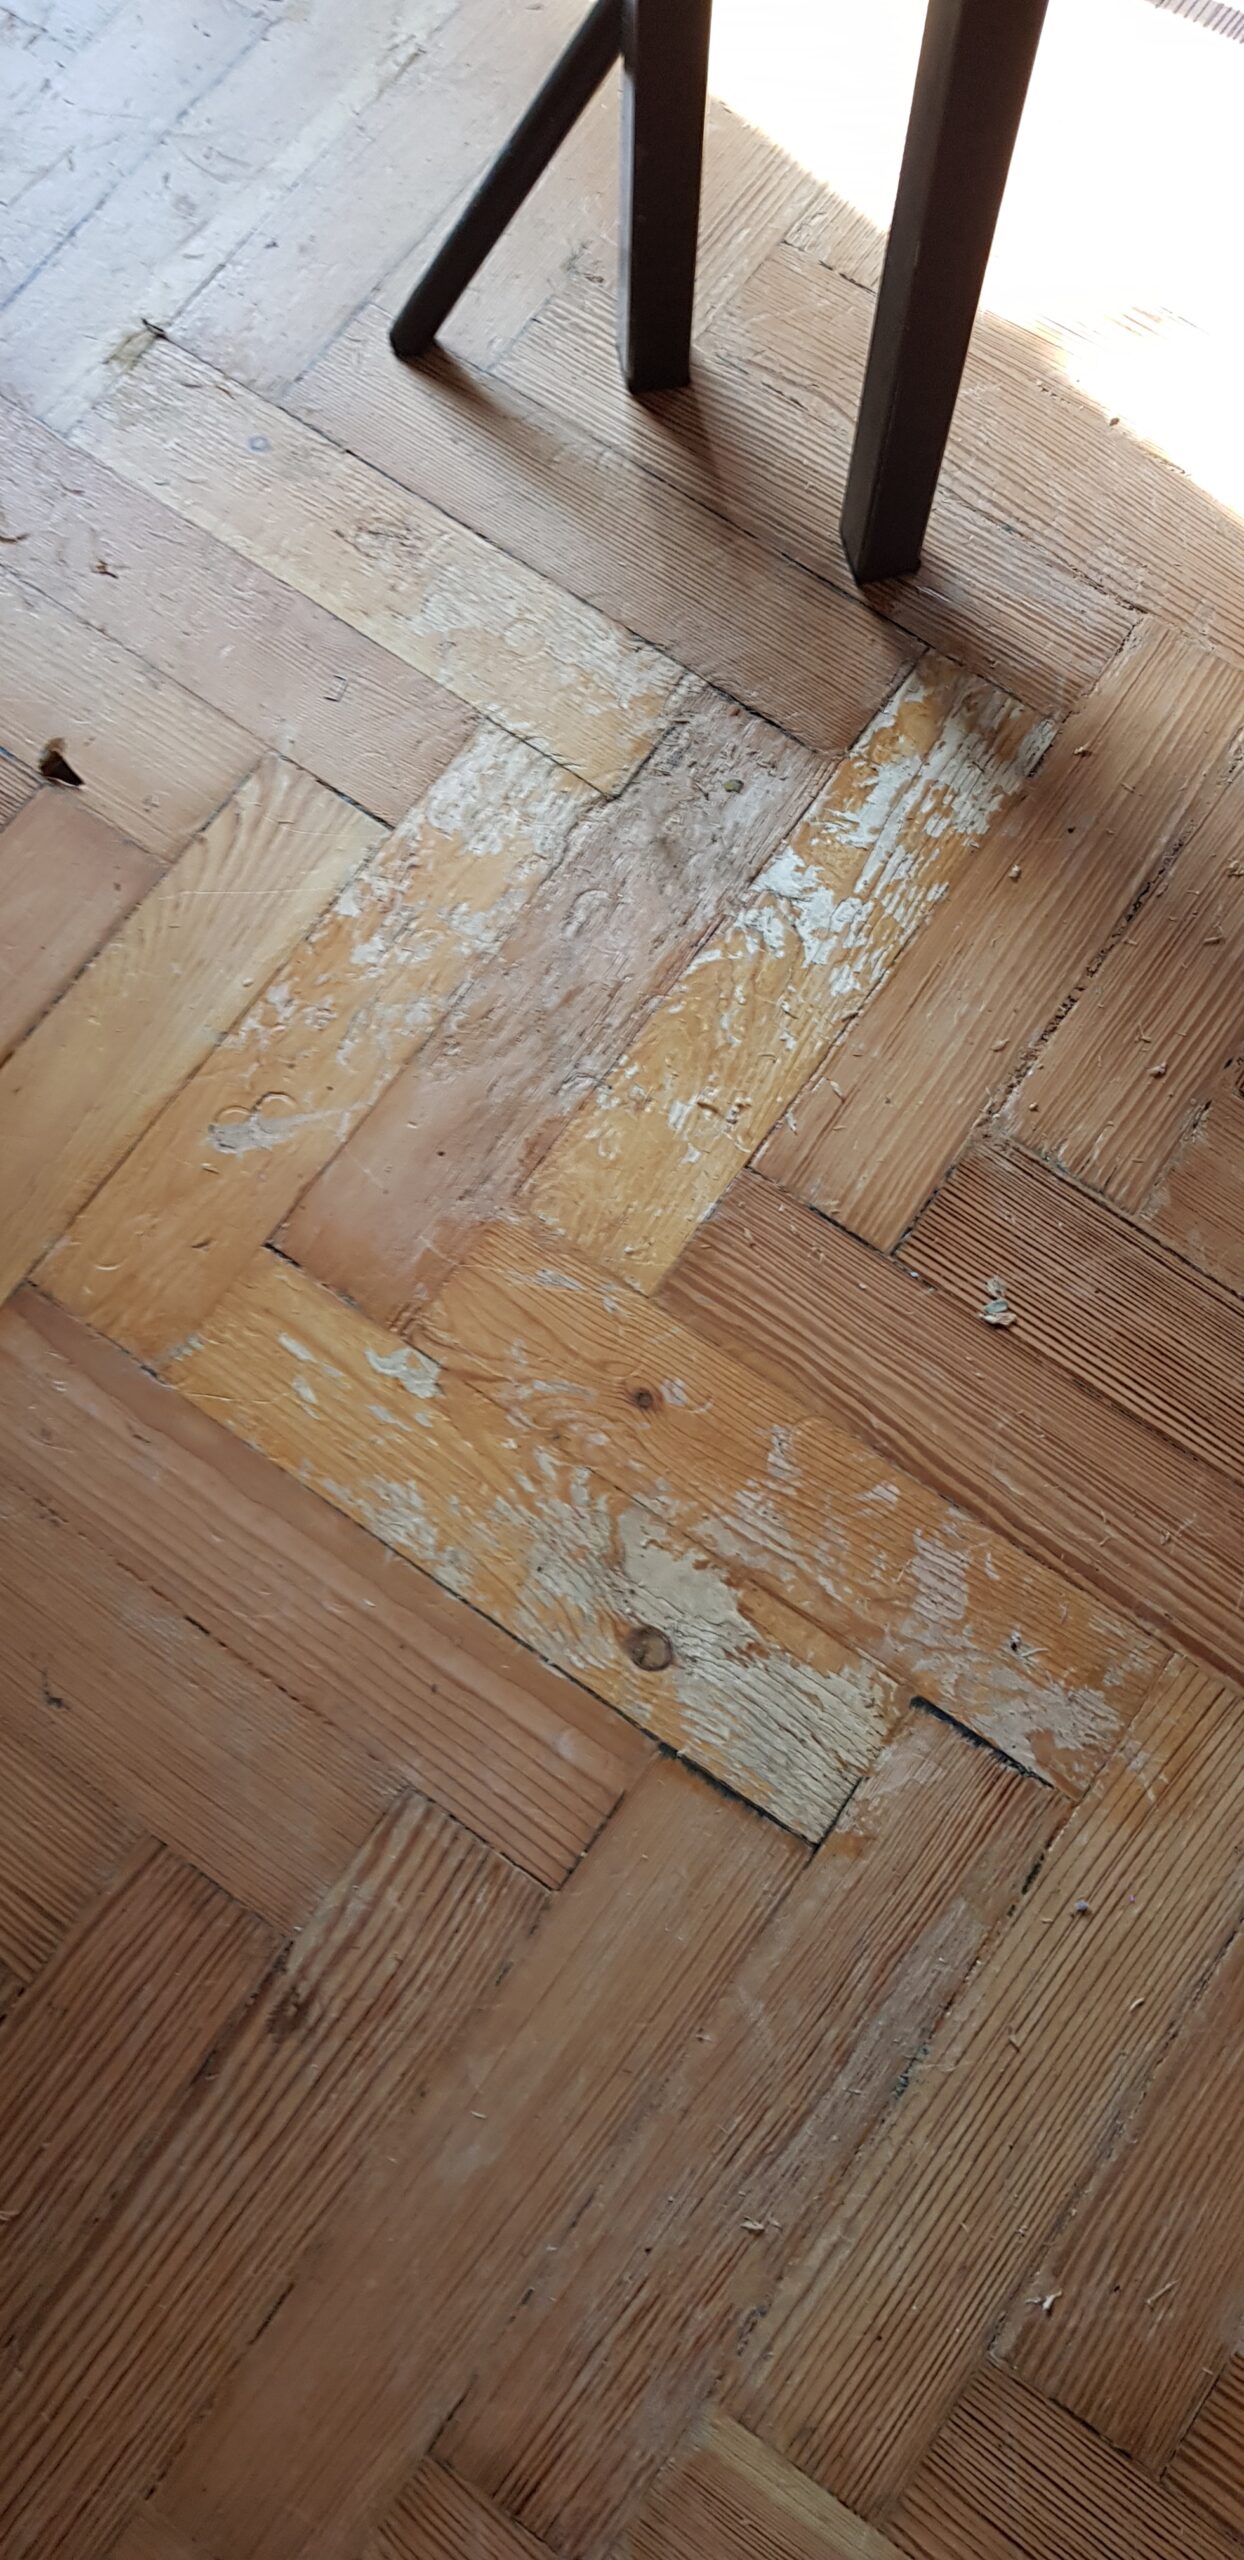
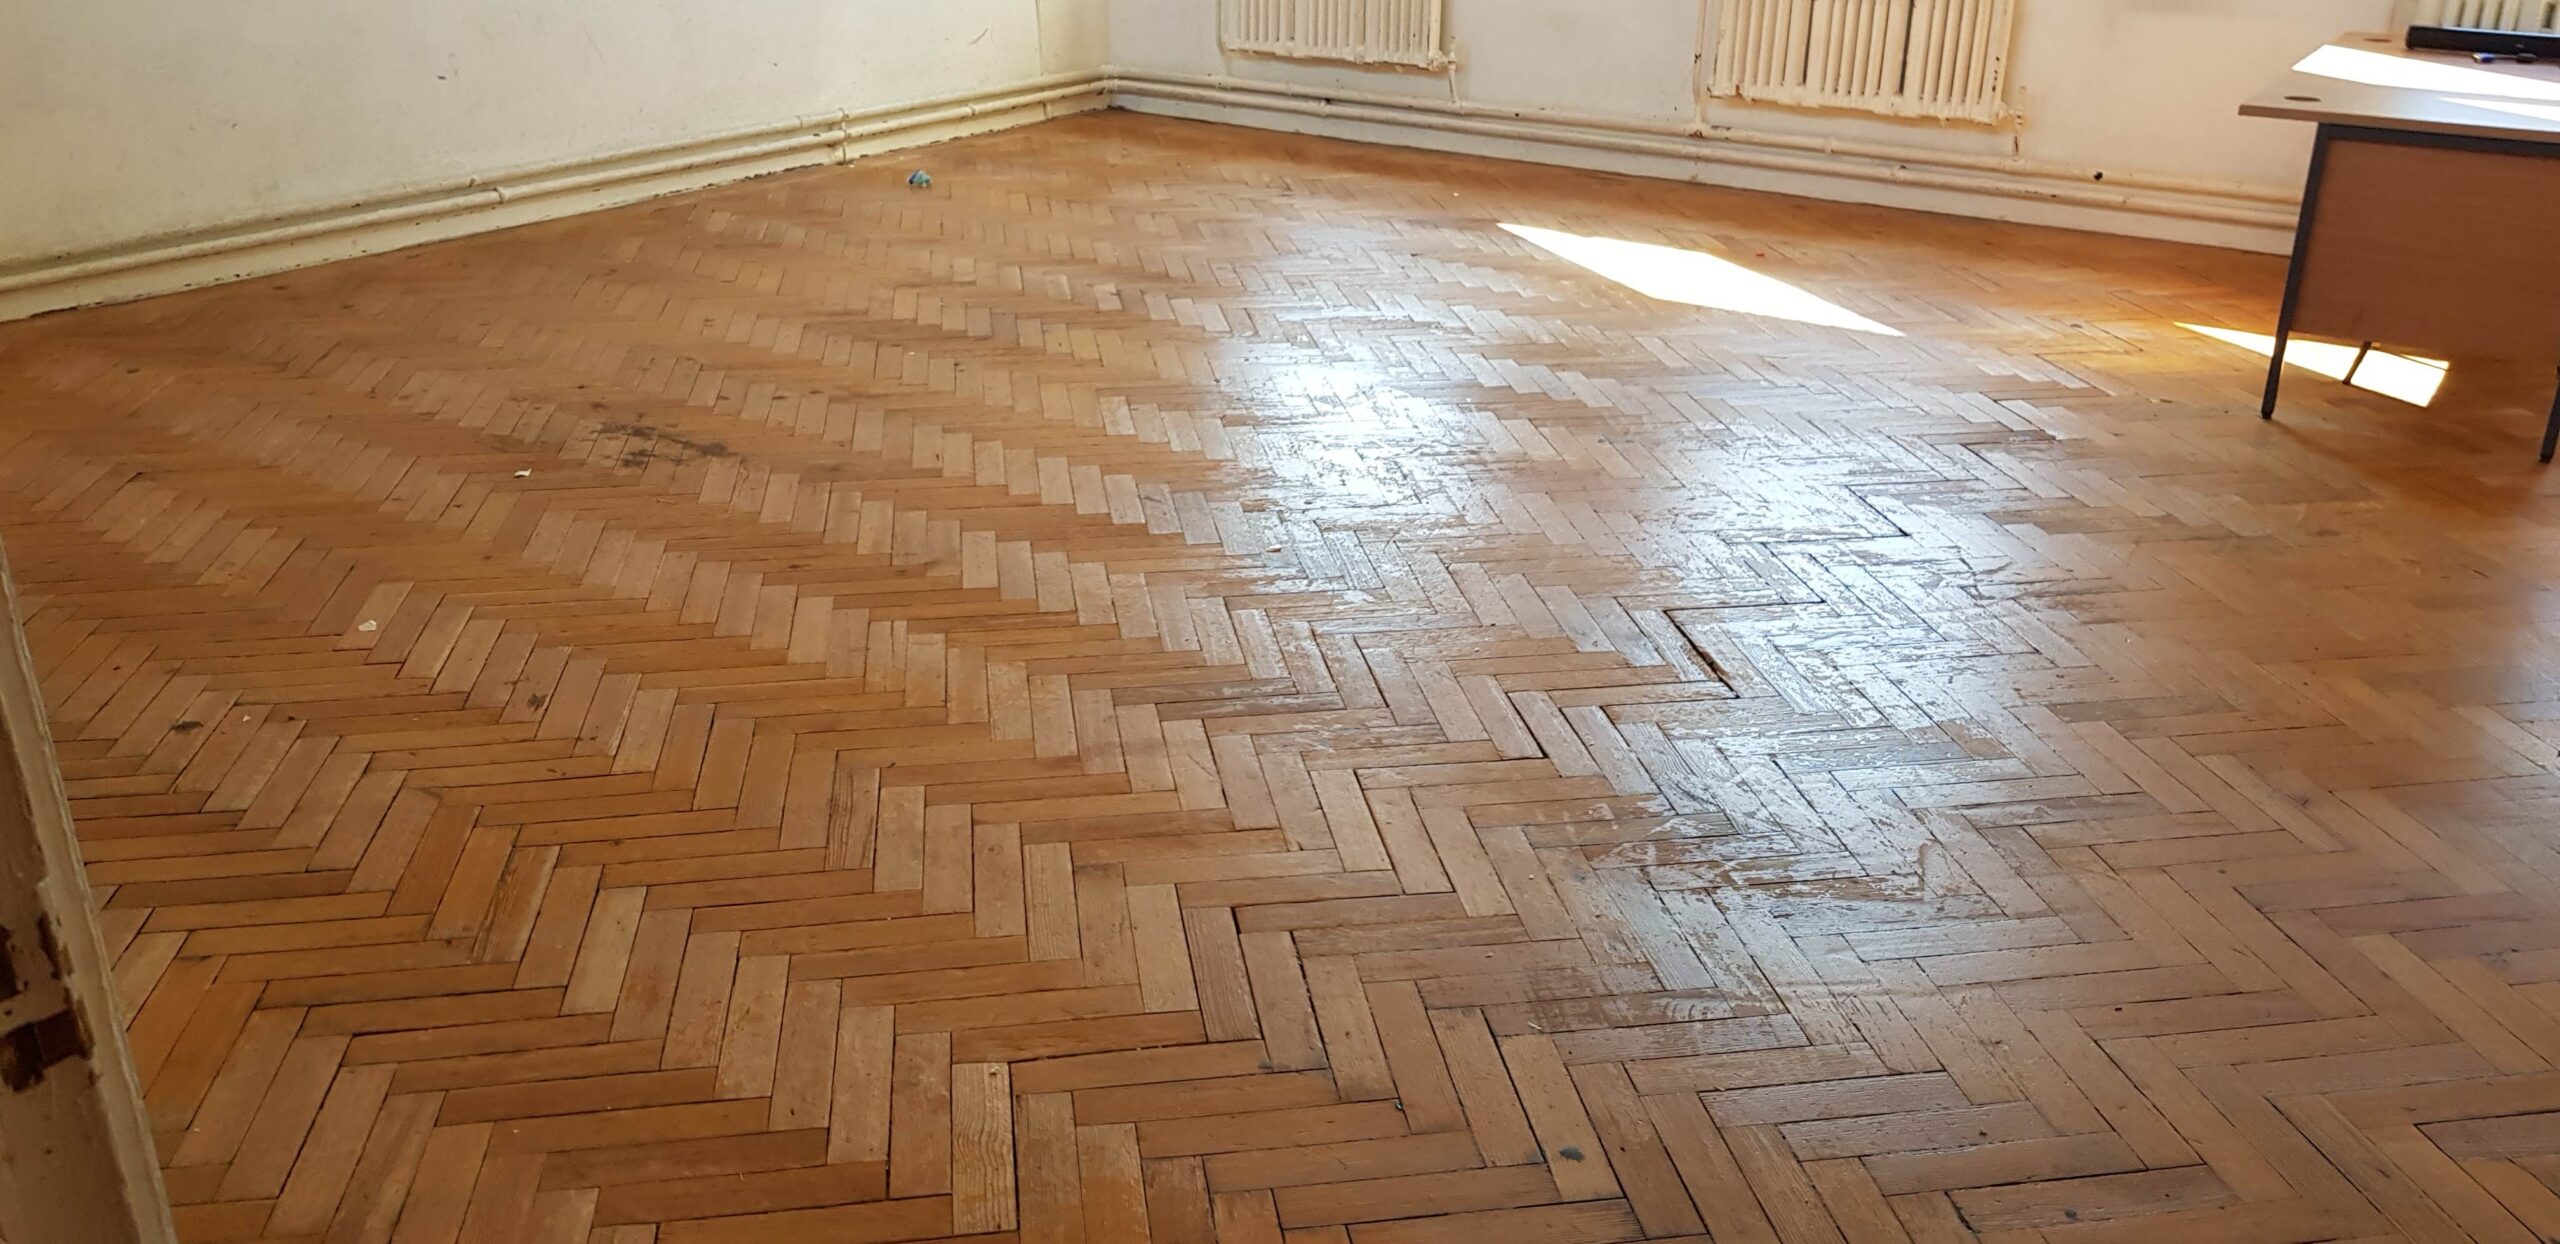
The Parquet Flooring Restoration Process

Upon arrival, The work area was made ‘out of bounds’ & also completed during the school holidays. The first priority was to remove, replace and repair damaged pieces of pitch pine parquet. While some pieces were entirely loose, their previous adhesive having worn away with time, others were carefully removed using hand tools. Prior to carrying out the work, we had a supply of appropriate size replacement parquet. When sourcing reclaimed wood, you must not let the perfect be the enemy of the good. It’s almost impossible to find blocks and lengths that are perfect fits with matching dimensions, simply because every building is different and many different fitting methods have been used over the years when it comes to wooden flooring. Also
before 1976 mainly imperial measurements are used, whilst metric was used after this time. It is also imperative that the moisture content is between 10% to 14% this must be checked with a professional moisture meter, this will be expanded upon in a future blog.
Sourcing reclaimed parquet of the correct age, condition and size is not easy, and as this is a finite supply a lot of checking is required. With perseverance and some good fortune, they were able to find parquet blocks that were longer than those being replaced, allowing the parquet to be sized with a single cut. It doesn’t happen often, so when it does they make sure to savour it!
 With repairs made and replacements fitted, the parquet is secured using a latex adhesive and allowed to cure before carrying on to the next phase.  The floor is now flattened using a virtually dust-free floor sander. Started with a course grit paper to ensure that the floor was smoothly levelled off. As covered in a previous blog <can we link to our blog covering the work at the church in Barkingside?> here, when sanding parquet it is important to go with the grain as much as possible. The floor is sanded multiple times at 90-degree perpendicular angles, going with the grain in both directions to ensure that everything is sanded evenly. We then used a medium and fine grit sanding belts to achieve a smooth finish. Then, also use flooring edgers to smooth in tightly about the skirting in the rooms as well. Some of the rooms had exposed iron piping that was fed into radiators, and the team took great care to ensure not to damage these pipes in the process.
Not only could we have damaged our sander, or chipped the finish on the pipe, but a high-powered sander is more than capable of shearing clean through old metal, posing a health and safety risk as well as opening up the possibility of water damage from the piping. The last machine to finally smooth the floor is a specialist parquet sander, this has multidirectional heads to give the parquet an exceptional finish before the sealer is applied. It’s all about preparation!!
completed finished parquet flooring

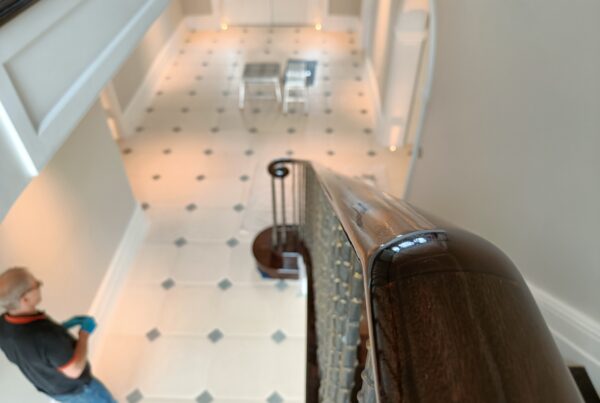
Once the stain had dried, we commenced with the polishing. French Polishing is a very delicate process, requiring multiple applications to achieve the desired finish. In the end, we applied 9 coats of shellac polish to reach the clients satisfaction! Each coat of polish is very thin and builds upon previous coats to add depth and richness to the staircase.  Although, for us, most important of all, is that French Polish will start to dry almost immediately! Each coat must be precisely applied for maximum effect, as there’s no room for error. Should your hand start to stray, you don’t have time to touch it up after or you risk tearing the finish. Long, continuous strokes are needed to apply the polish correctly, as it dries so fast that a careful eye can tell in which direction (and even how) the polish was applied.

In total, we coated up 20 steps, door thresholds and several handrails throughout the house, but you have to remember that each was carefully coated 9 separate times! 180 individual applications of French Polish, but we think you’ll agree that the end result was well worth it.

French polishing gives a superb finish and is extremely adaptable. It gives the highest quality finish that improves in time like a vintage wine. As well to fine homes, we have also been commissioned on private jets, luxury boats, banks, embassies and hotels.