
Mixing things up, we’re going to walk you through how we worked to restore this pre-used unloved Mahogany Chest of Draws until it was better than new!
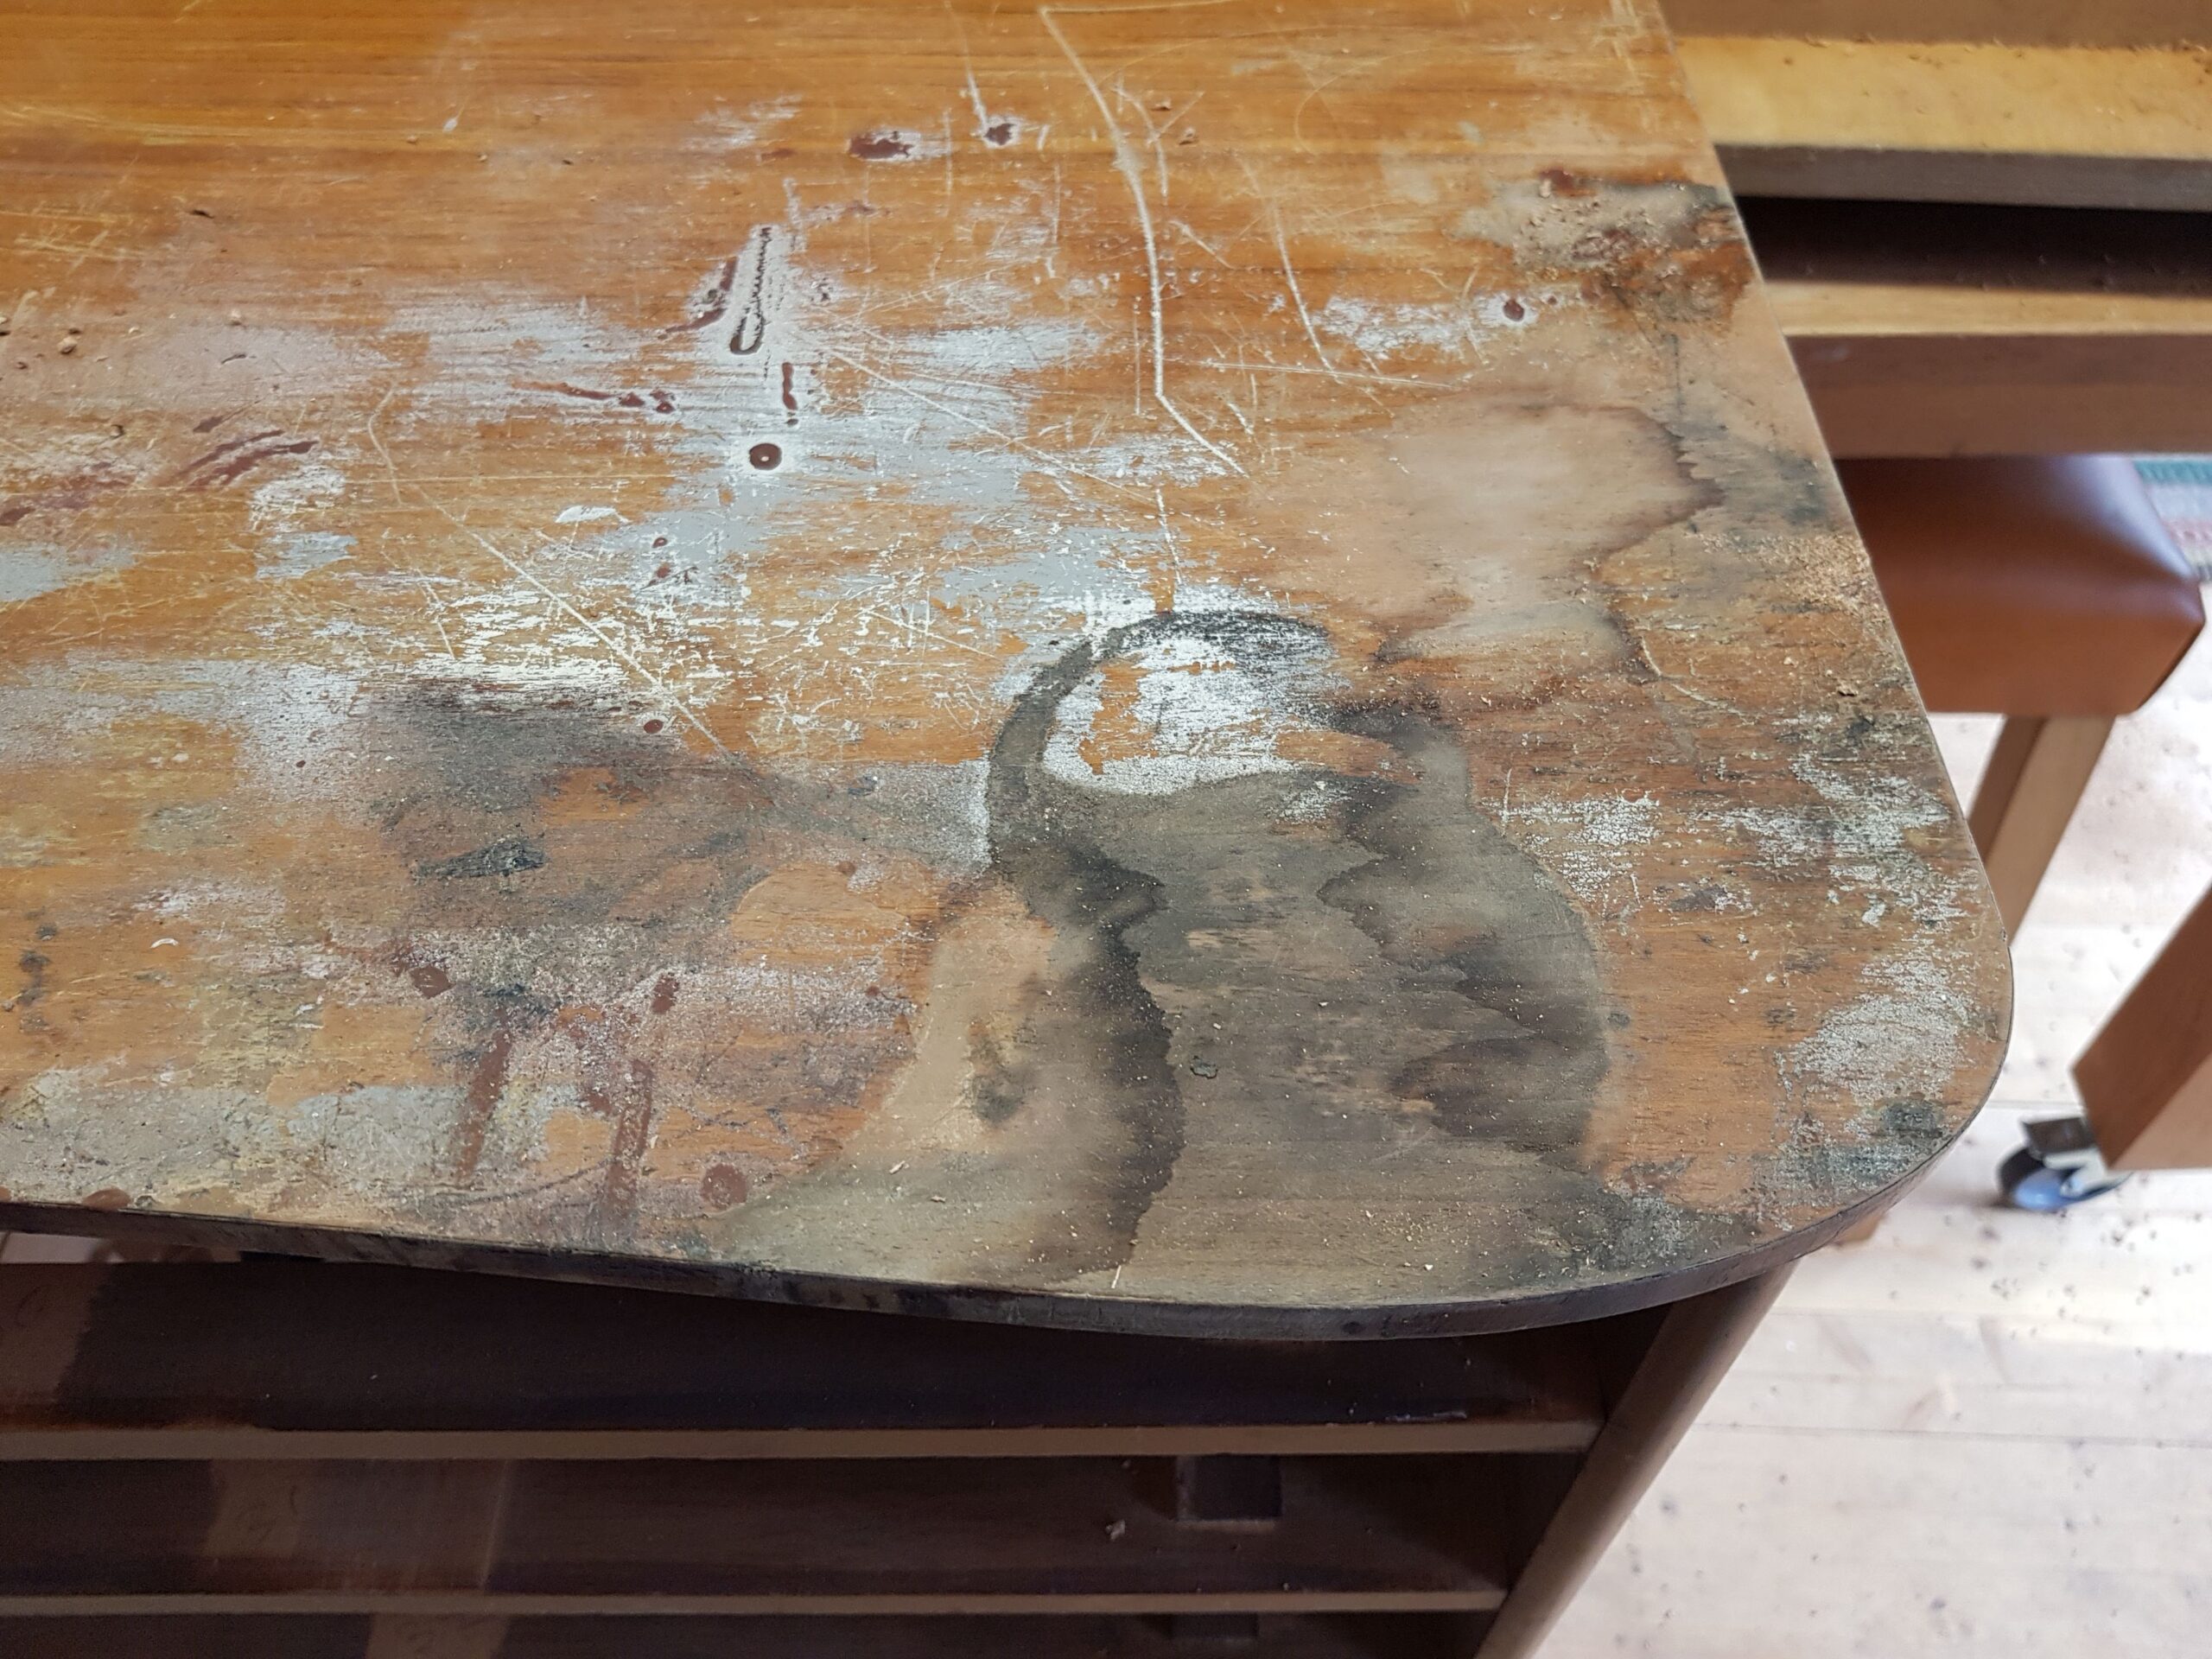
It was brought on an online auction site, with only a couple of bidders – as you can see in the photos below, this Mahogany Chest of Draws had seen better days !! It is approx. 80 – 100 years old, the top and draw fronts are mahogany veneer. Its sizes are 1.1 meters high 80cm wide & 4cm deep. So a good size for a modern bedroom. We purchased the unit we first took it into our workshop. The existing finish had almost entirely decayed through wear and tear, as well as poor storage in the shed. The top suffered ink marks, that had not been wiped off. As you can see, the mahogany framework wood was also damaged. What the pictures do not show is the smell of engine oil, that lingered for a week.
Chest of Draws Restoration Process
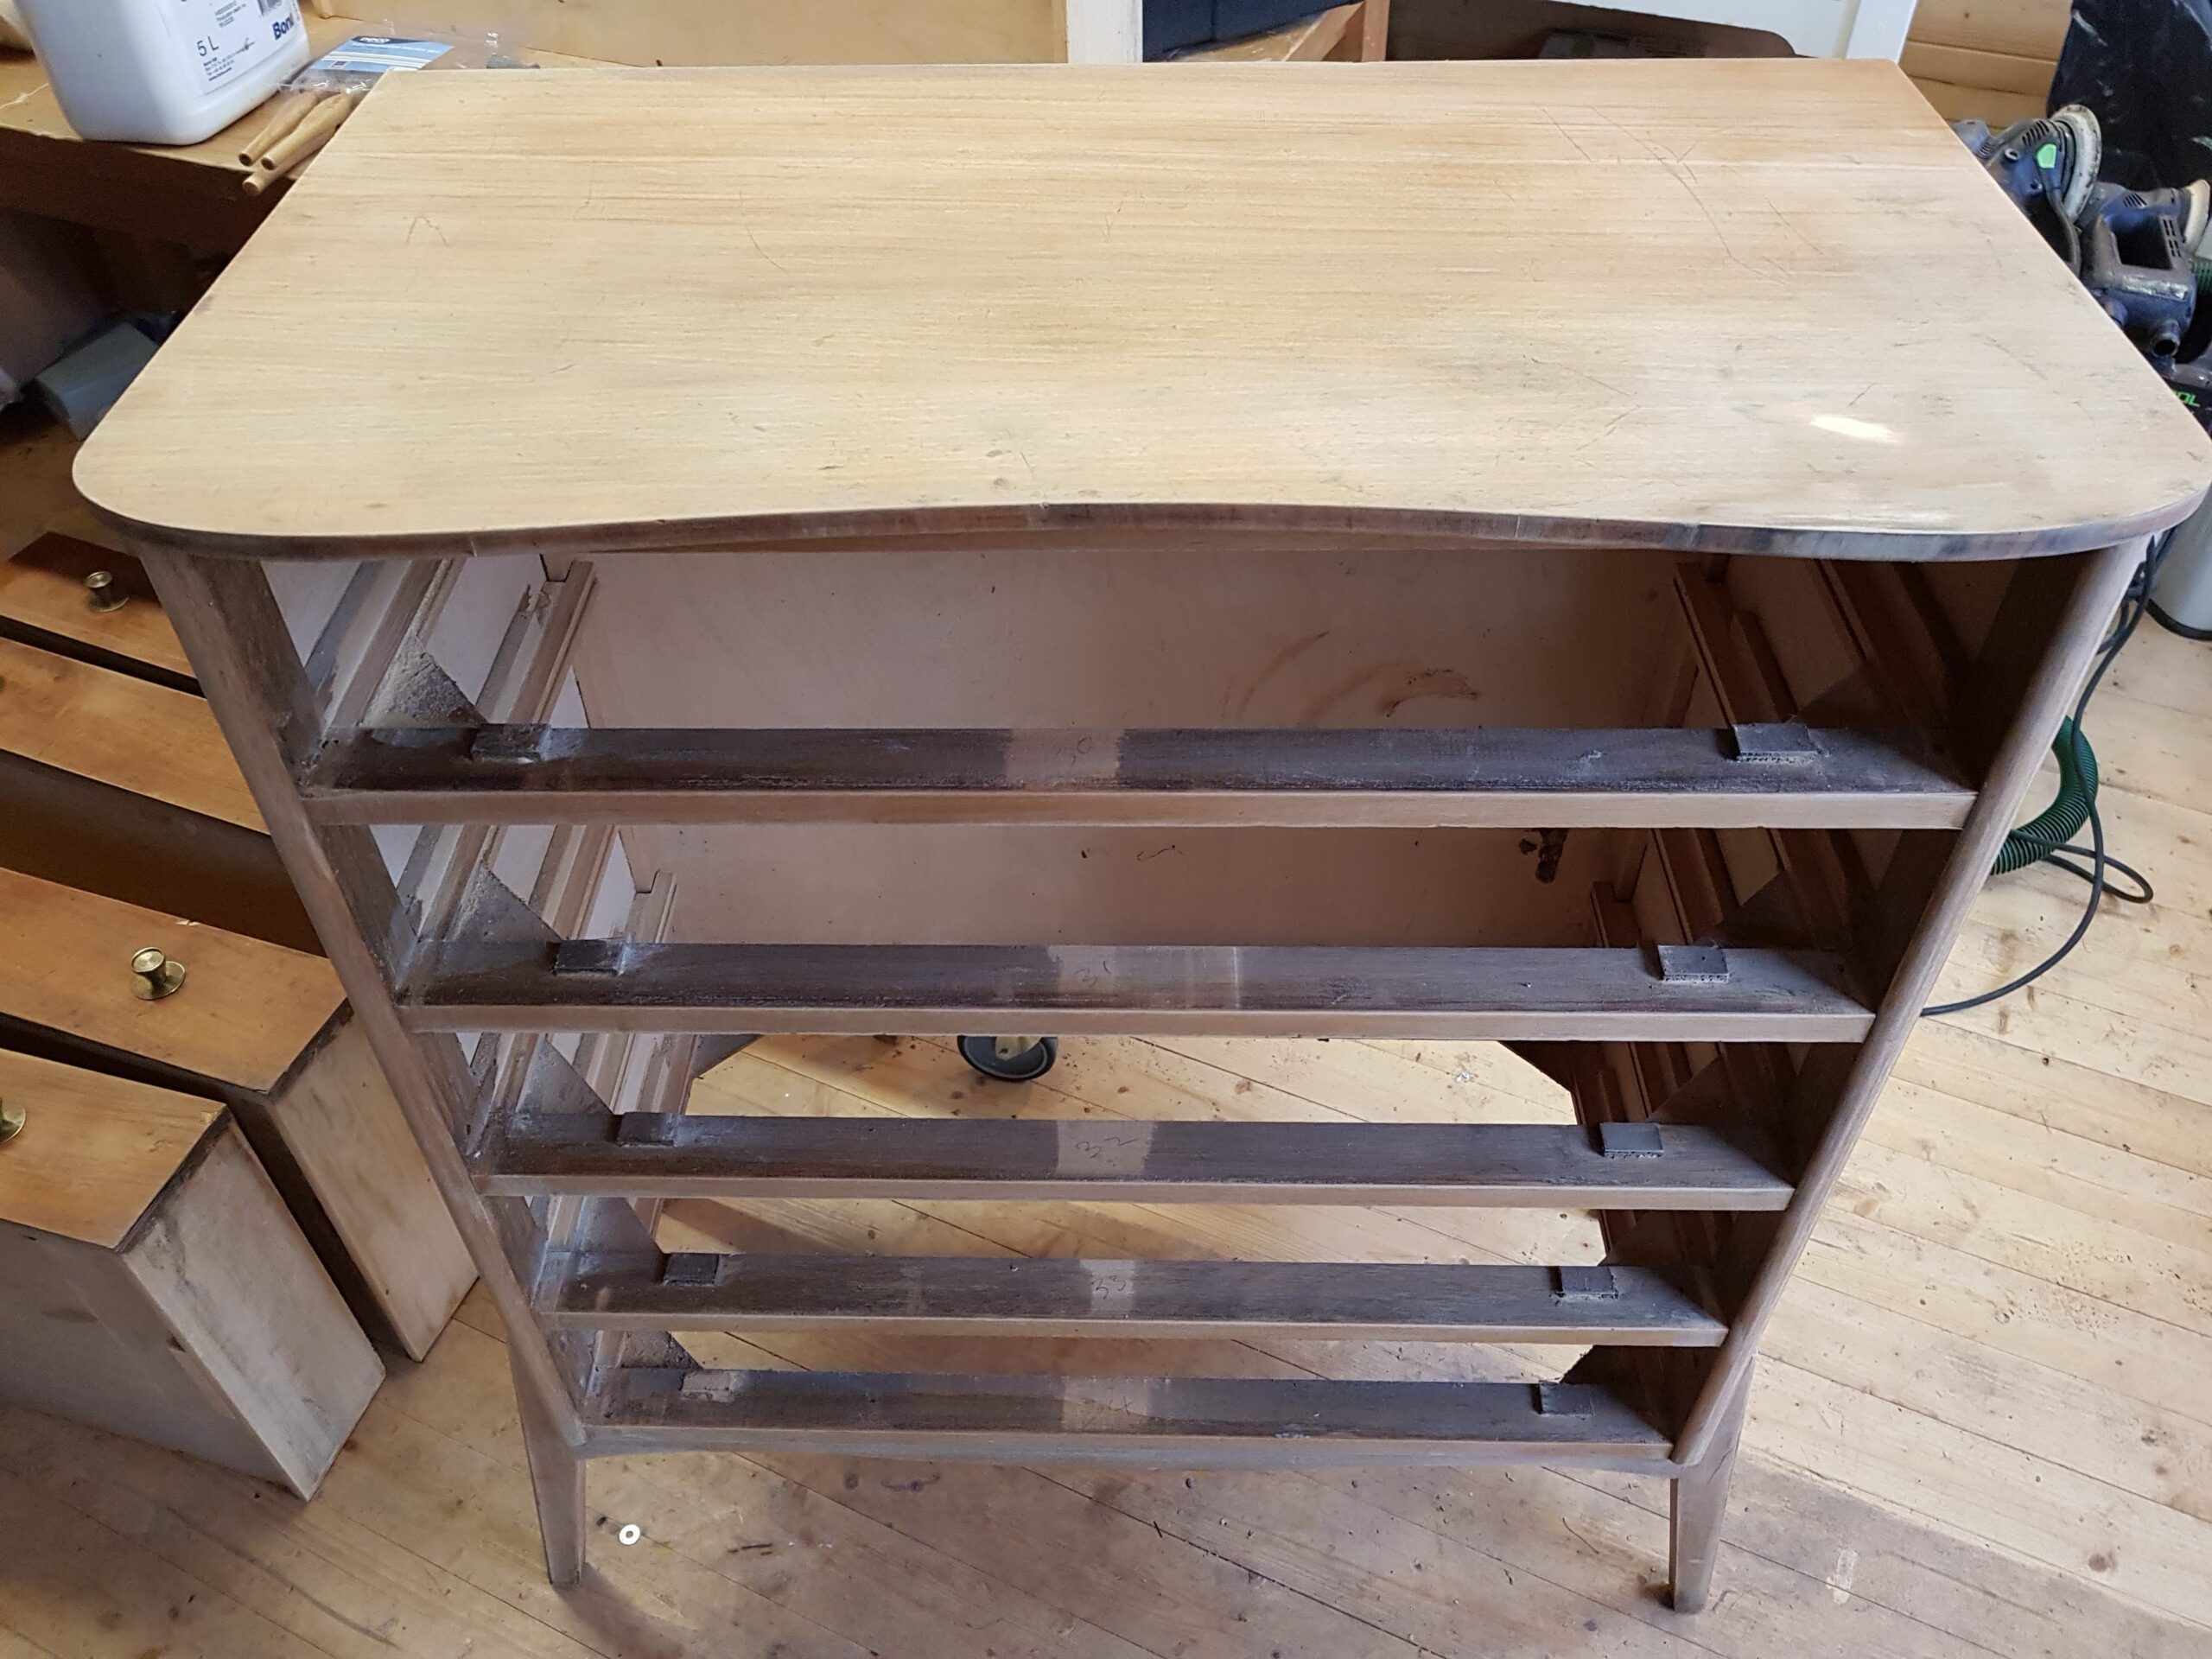
As with many undertakings, the first step is to remove the draws, put them on the bench and clean up so we can better see what we’re working with. As the existing finish on the chest of draws was too badly damaged. We decided to carefully chemically strip the existing finish, together with a light sanding to remove a lot of the roughage, as well as stripping away remnants of the original finish So as not to damage the mahogany wood and veneering. It’s very important to do this carefully and thoroughly, as whatever finish we decide to use, it will enhance and accentuate whatever is beneath it. In this case, if there are remnants of the original finish remaining, they will show through in our finished product, creating an undesired contrast in both colour and tone. The ink blotting had to be removed with an acid solution, which worked extremely well. As with all solvents, always use the correct PPE in a well-ventilated area.
What Is Mahogany Curved Chest of Draws Restoration?
The structure of the unit also required some work to repair and strengthen it. During the Mahogany Curved Chest of Draws Restoration, several of the drawers was weak at the seams, and one of the legs at the base was crooked and required replacing. We carefully sourced a matching wood replacement, cut it to size and affixed it, taking care to ensure the top surface of the unit was level. We also took care to check the runners on each drawer were level and smooth. While a lot of contemporary drawers will use small wheels in their runners to help guarantee ease of use, this piece of furniture precedes such trends and we wanted to keep it that way. With that in mind, the runners had to be finely sanded to keep the surface both within the unit itself, as well as on the drawer, as smooth as possible to keep any friction to a minimum. Later in the project, we’d apply a generous coat of wax to the runners to help lubricate them.
With the structure of the unit repaired, it was time to get some fine smoothing done! This is important to ensure that the product is smooth to the touch at the end of the job, but also to work to mitigate and remove as many traces of damage as possible. When wood is mishandled, dropped and stored improperly, it can be dented and suffer imperfections. Unfortunately, these marks and blemishes can be tough to remove. When sanding, you are always reducing the amount of wood you have to work with, you can never gain surface area, only lose it.
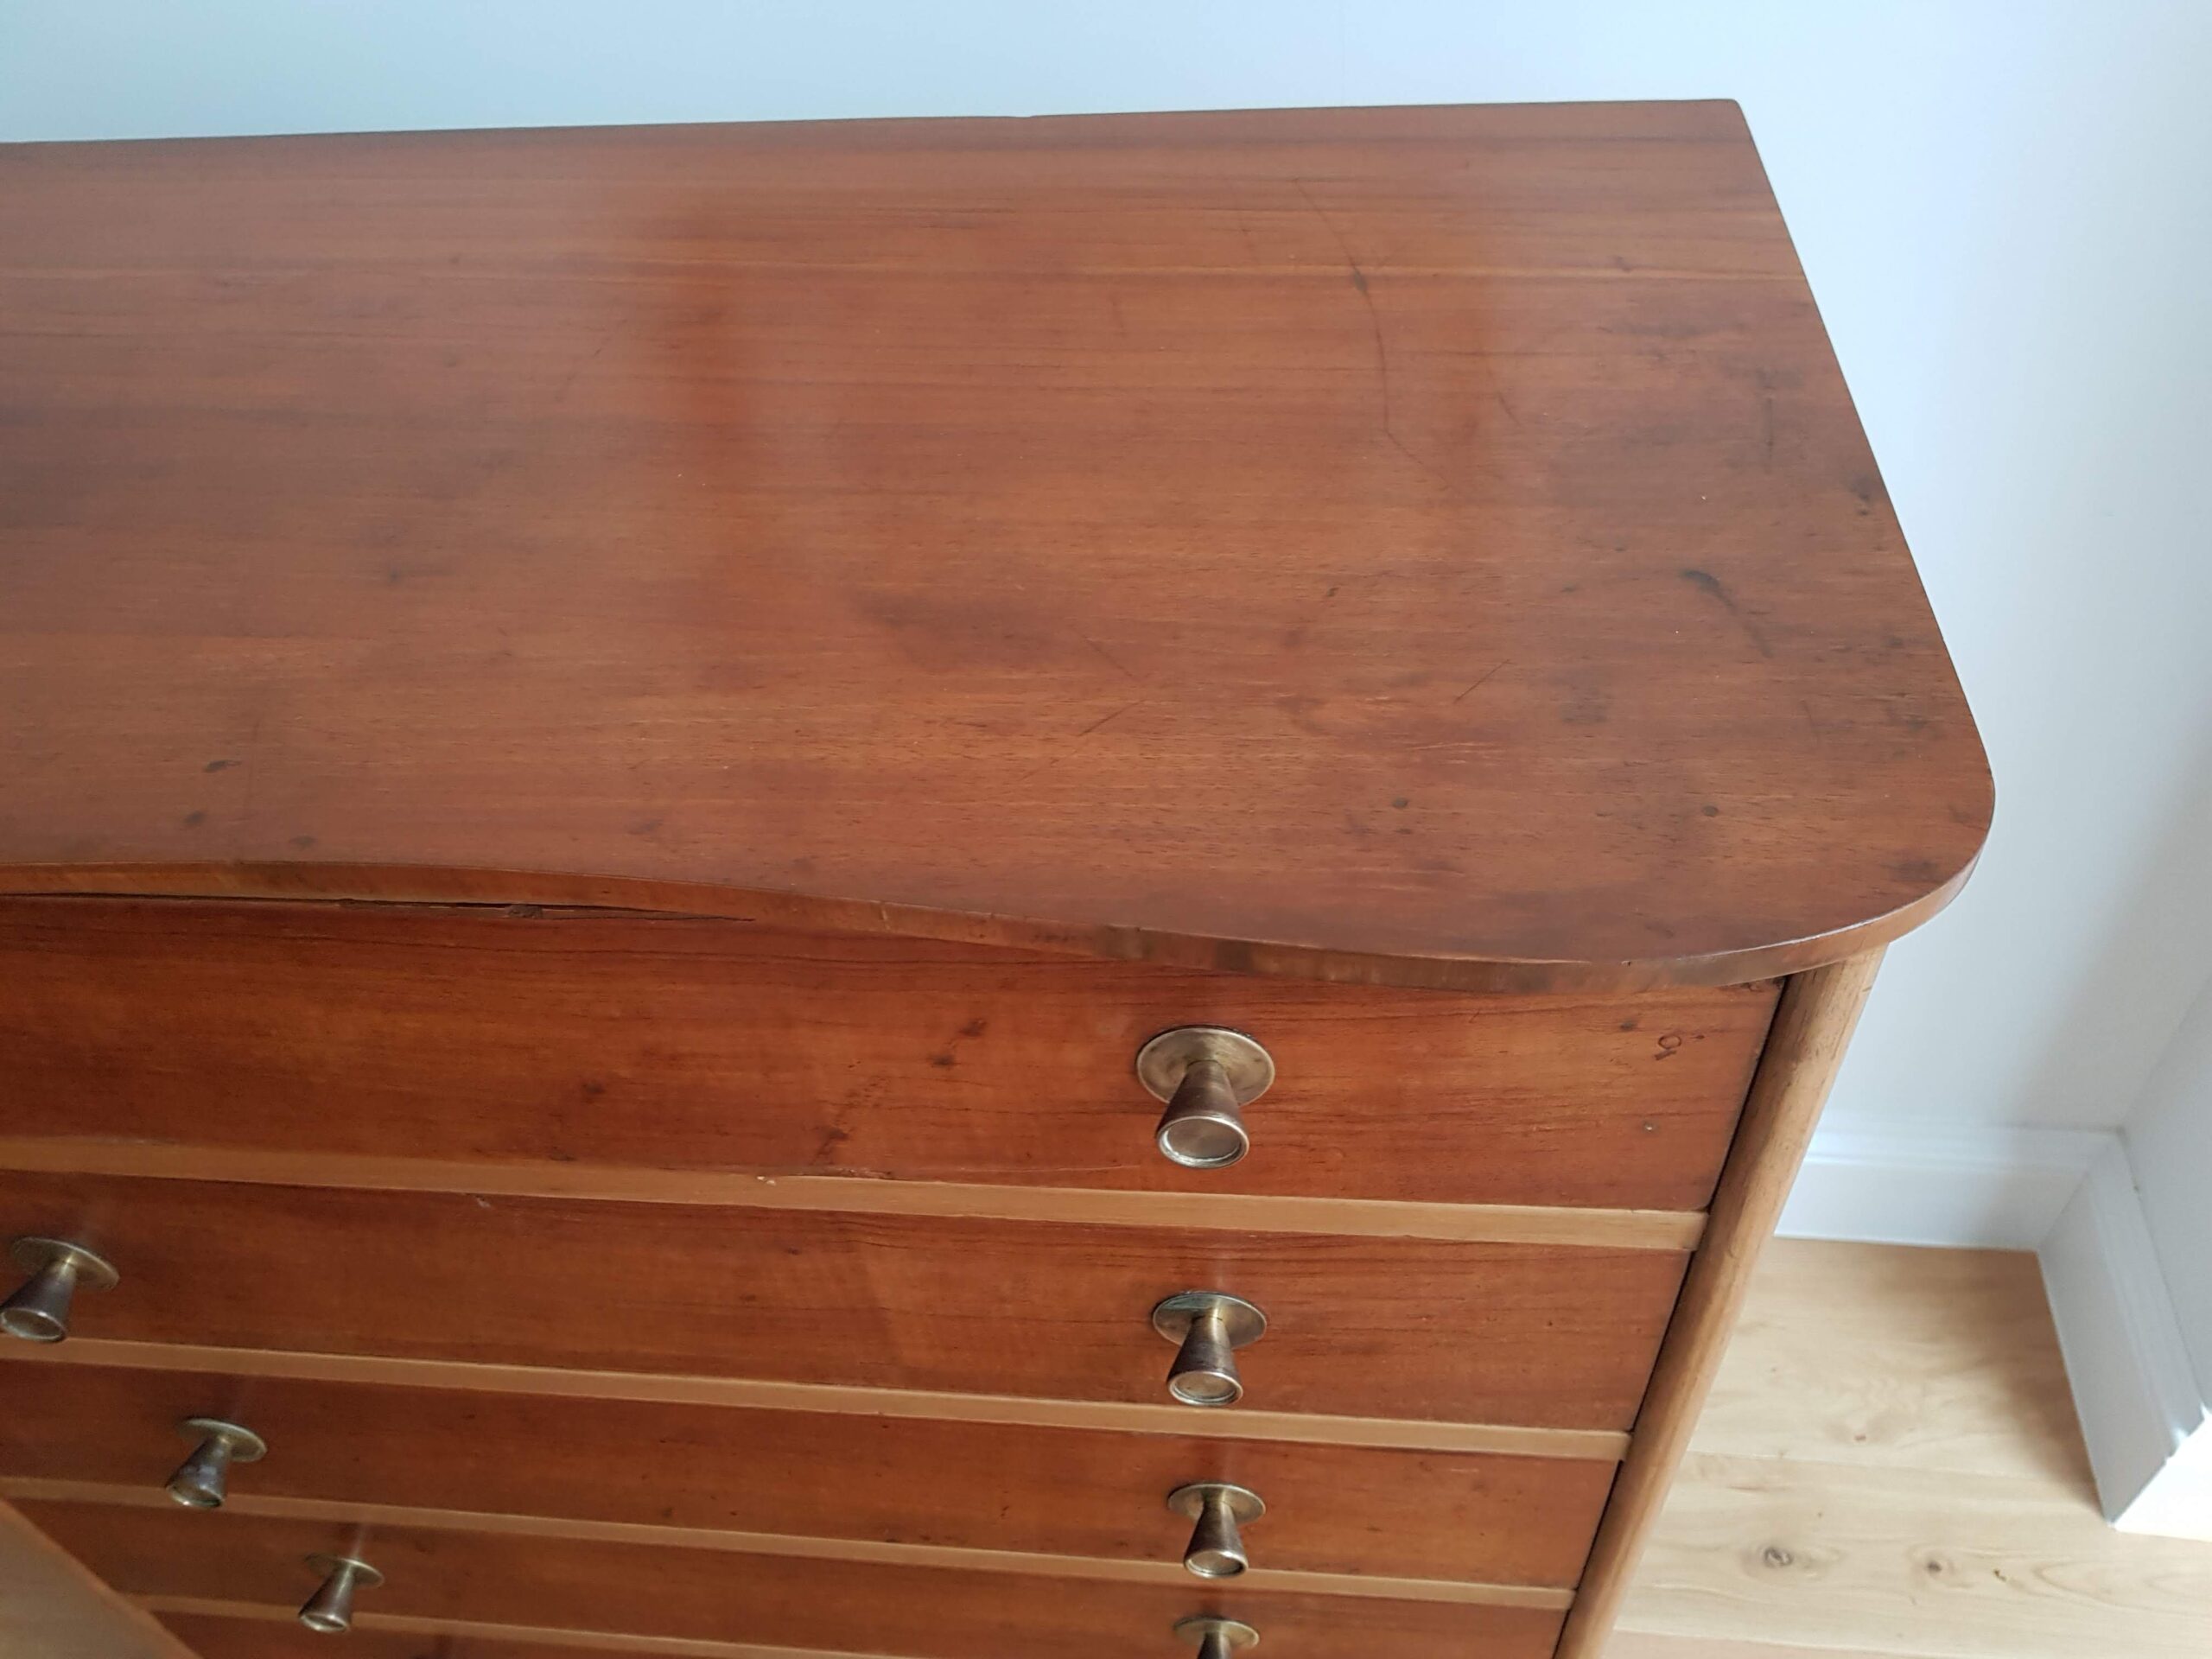
Since many of the damages suffered are gouges and dents, they also cut into the amount of wood you have to work with. Sanding to level these out is a fine balancing act, as if you’re not careful, to remove a gouge you can end up creating a big dip in its place. With this in mind, it can often be best to tidy up any blemishes to remove rough edges, and then use a natural wax to fill in the gap. We did this multiple times during this project, and as is often the case, when you do something right, nobody notices you’ve done anything at all. Blending this natural wax into the grain of the wood to match the colouration is a very time-consuming process, but one that is worth it in the end.
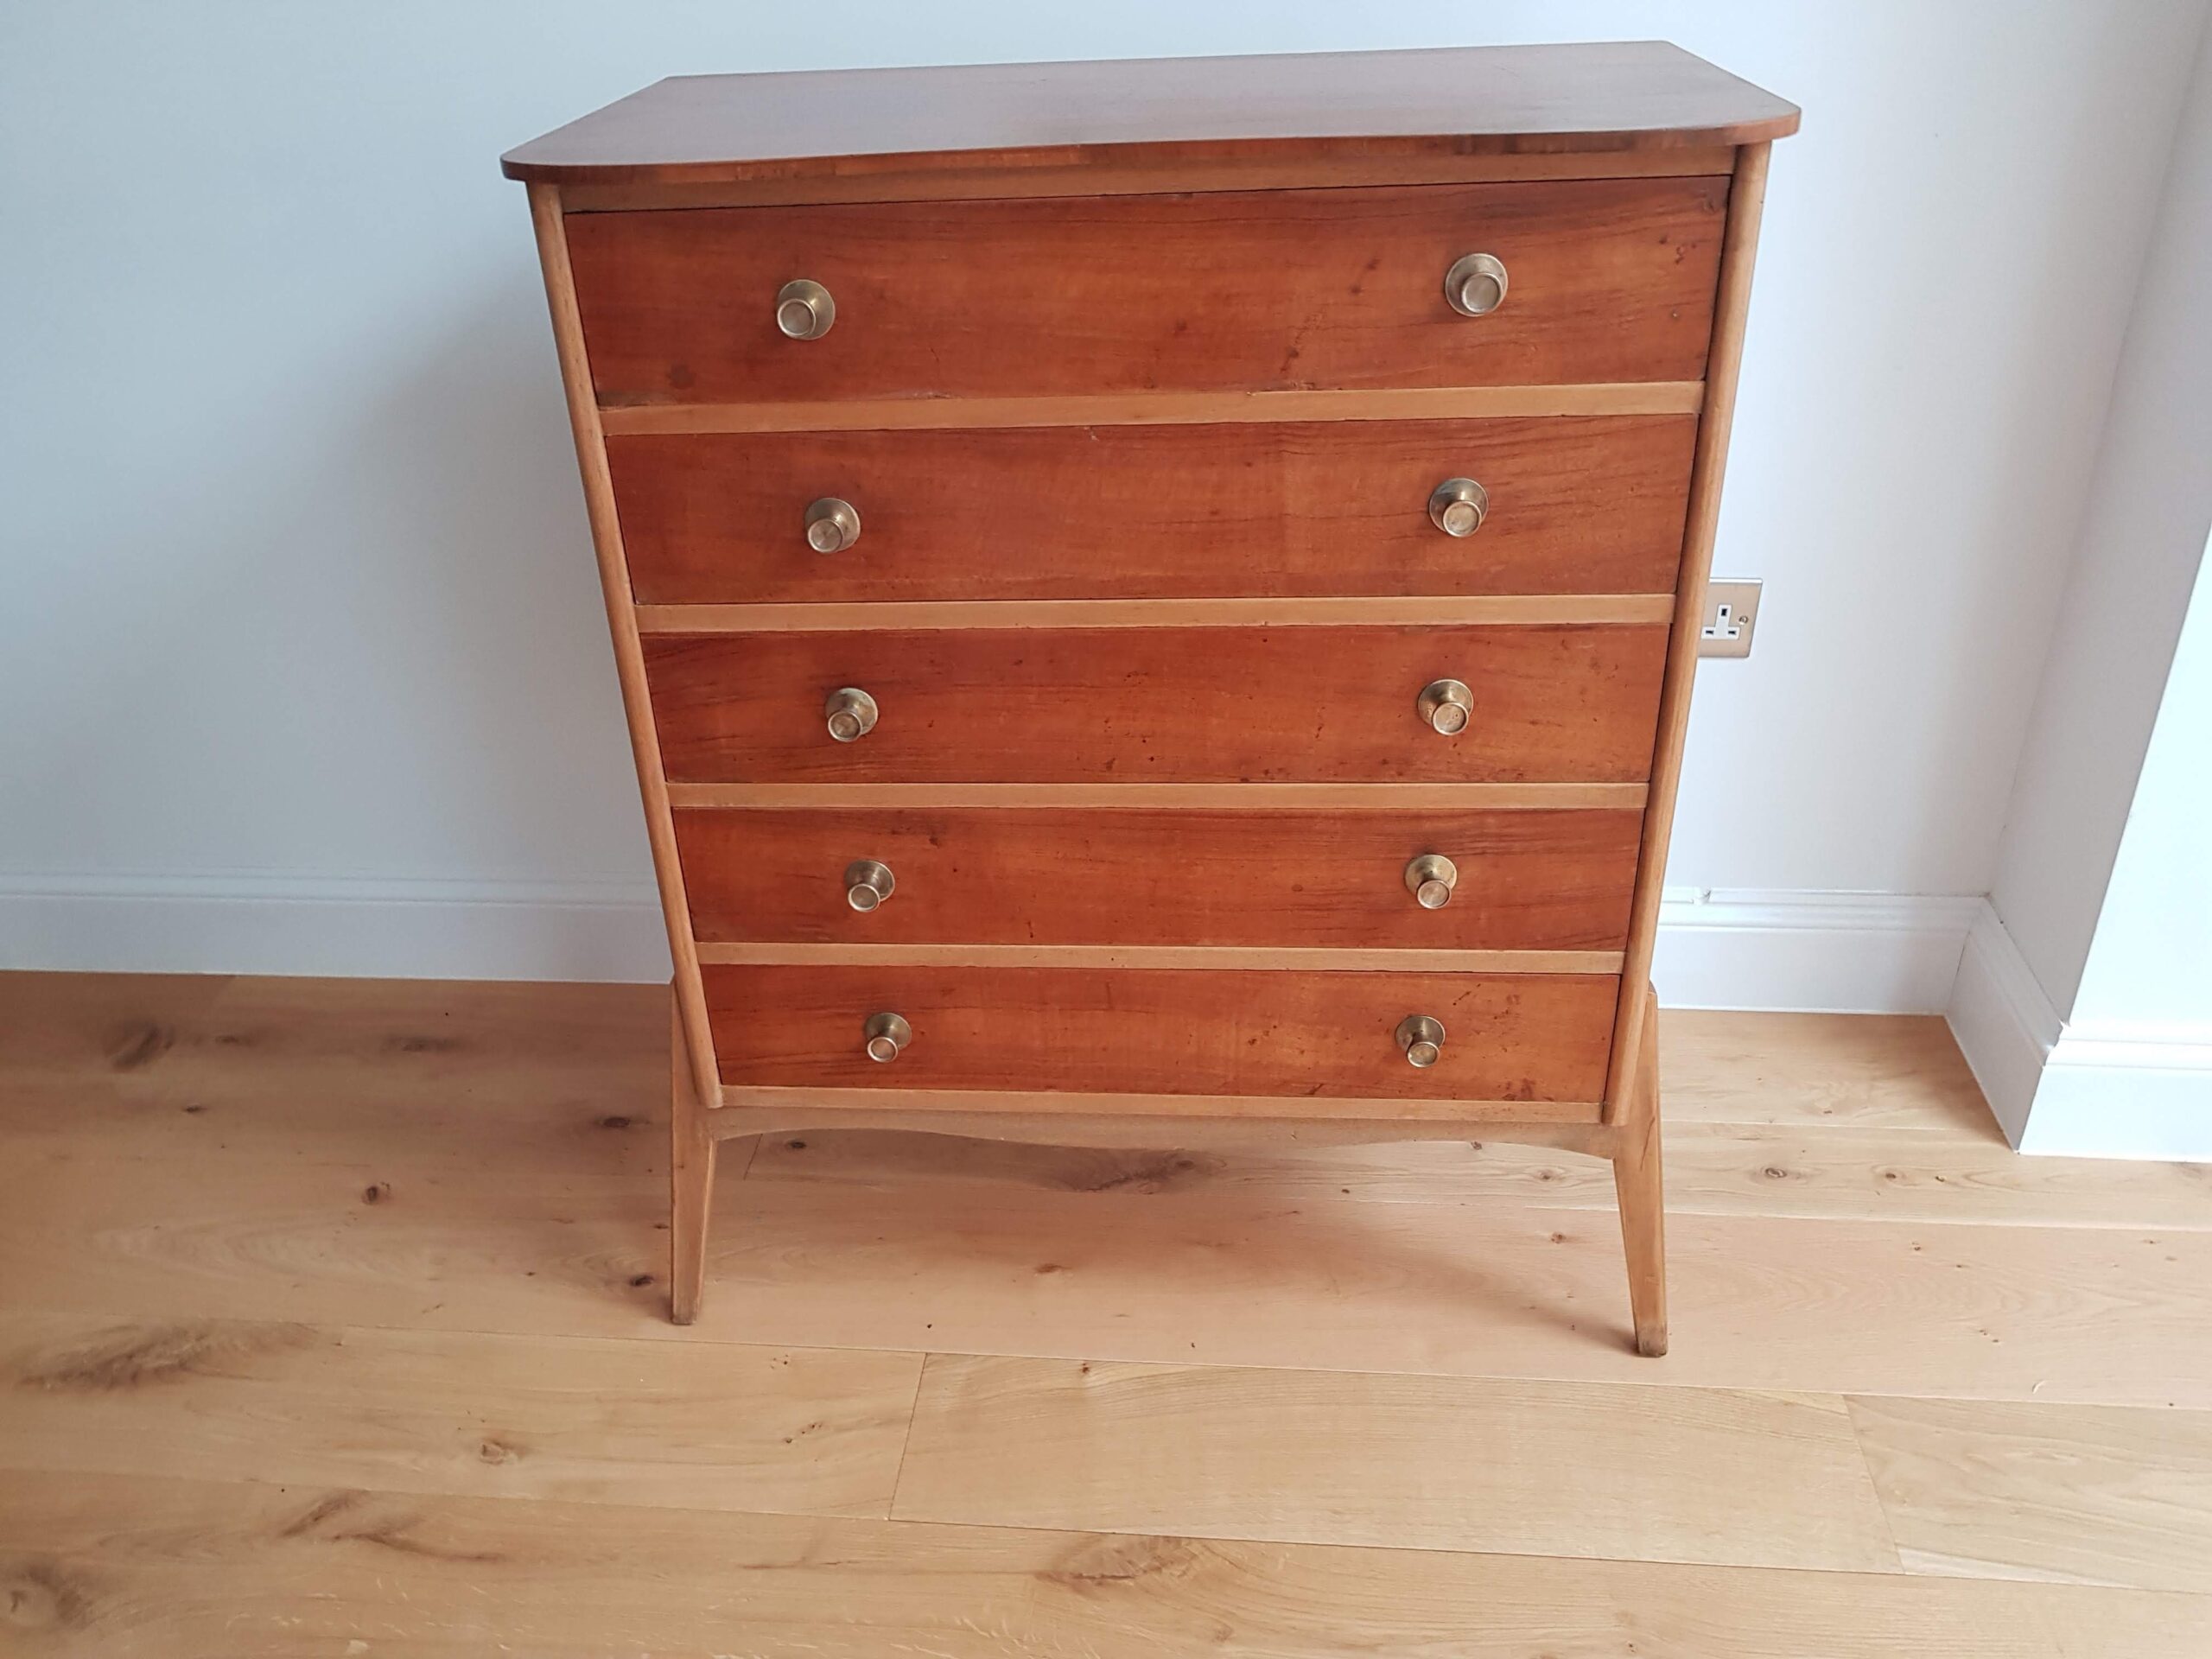
With the unit and drawers fully sanded, it was time to apply our finish. In the end, we settled on using traditional french polish, to keep in sympathy with the mahogany and finished with beeswax, this gives a lighter, natural finish that allows this wonderful mahogany C.O.D. to blend seamlessly into a modern home setting.